
-
1. About ZenTao Biz
- 1.1 About ZenTao Biz
- 1.2 Get ZenTao Biz
- 2. Installation
- 3. Update and Upgrade
-
4. Features
- 4.1 Users and Privileges
- 4.2 Gantt Chart
- 4.3 Effort
- 4.4 Repository and Code Review
- 4.5 Calendar
- 4.6 Import/Export MS Excel Files
- 4.7 SMS Notification
- 4.8 DevOps Management
- 4.9 Export MS Word Files
- 4.10 Crystal Report
- 4.11 LDAP authentication
- 4.12 Feedback Management
- 4.13 Summary Report
- 4.14 Document Management
- 4.15 Export a Report
- 4.16. Office Automation
-
4.17. Workflow
- 4.17.1 Build-in Workflow
- 4.17.2 Workflow Introduction
- 4.17.3 Example: Customize Build-in Workflows
- 4.17.4 Example: Add a Workflow
- 4.17.5 JS and CSS
LDAP authentication
- 2016-06-17 10:24:03
- azalea
- 16395
- Last edited by Hongyan on 2022-01-30 08:50:14
- Share links
LDAP authentication is dependent on the LDAP extension in PHP, so it has to load the LDAP extension first. Please refer to Chapter 2.7 Install LDAP extension.
1. Introduction
By configuring LDAP, auto login to LDAP server is integrated with ZenTao. User accounts can also be imported from LDAP.2. General configuration
Go to Admin->LDAP.
Click LDAP and you will see the page to do LDAP settings. If the configuration is successful and correct, you can use the LDAP username and password to log in and ZenTao will automatically verify the login and add the user to its database.
Check Anonymous, admin account and password will be hidden. Then you do not have to fill that in.

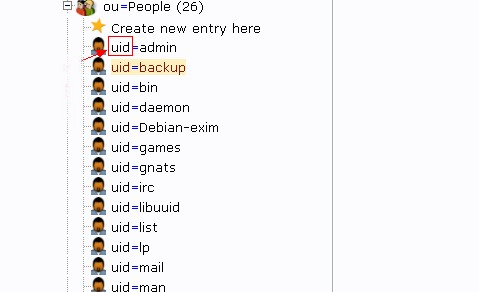
The login name is the username in the LDAP server as shown below,
3. Active Directory configuration
Select “Active Directory" in Server Type. Because the active directory does not allow anonymous login, so you have to fill in the Admin account and password.
Note: The admin account must have privileges to do administration work on the domain, otherwise it might be an error when you request the data.
4. Import users from LDAP
After the configuration is done, you can click "Import users from LDAP".
4.1 Search
Go to Company->User, and click "Import users from LDAP". You can find the Search button on the page of Import.
SCREENSHOT
Click Search and you will search the imported users accordingly.
SCREENSHOT
You can also search by conditions, including Real Name, Email Address, and customized conditions.
Take the search in the screenshot above as an example. If you want to search a sn that is not wang, enter !(sn=wang) in the Custom column. IIf you want to search a sn that is wang, enter sn=wang.
4.2 Differentiate duplicated users
When importing users from LDAP, you can choose to differentiate duplicated names. For real names in LDAP that is the same as the one in ZenTao, you can
- add a number to the real name, e.g. John Teng, and John Teng2; or
- add the department name to the real name, e.g. John Teng(Dev), and John Teng(QA).
The default setting is to add a number to the real name.
SCREENSHOT
If you choose to add the department name to the real name, choose the department when importing users. If you did not choose a department for the user, it will be John Teng(0).
SCREENSHOT
The imported users with real names as others are shown in the screenshot below.
SCREENSHOT


Support
- Book a Demo
- Tech Forum
- GitHub
- SourceForge
About Us
- Company
- Privacy Policy
- Term of Use
- Blogs
- Partners
Contact Us
- Leave a Message
- Email Us: [email protected]


