
-
1. Introduction
- 1.1 About ZenTao
- 1.2 Introduction PDF
- 1.3 Technical Support
- 1.4 Follow Us
-
2. Installation
- 2.1 Choose the Right Installation
- 2.2 ZenTao Cloud
- 2.3 One-click Installation for Windows
- 2.4 One-click Installation for Linux
- 2.5 Lampp Installation in Linux
- 2.6 Source Code Installation (for all systems)
- 2.7 Source Code Installation for macOS
- 2.8 XAMPP-VM Installation for macOS
- 2.9 XAMPP Installation for macOS
- 2.10 Install ZenTao in Docker
- 2.11 Install httpd, Mariadb, PHP 7.2 in Cent OS 8
- 2.12 Softaculous Service
- 2.13 Install Ioncube
- 3. Update
-
4. Users and Groups
- 4.1 Company Structure
- 4.2 Add a User
- 4.3 Manage Users in batches
- 4.4 Groups and Privileges
-
5. Quick Start
- 5.1 Project and Task Management
- 5.2 Bug Tracking
- 5.3 Product Management
- 5.4 Todo Management
-
6. Basic Application
- 6.1 Basic Workflow
- 6.2 Agile and Scrum
- 6.3 ZenTao and Scrum
- 6.4 ZenTao Tutorial for Rookies
- 6.5 Create a Product
- 6.6 Create a Story
- 6.7 Create a Project
- 6.8 Confirm a Story
- 6.9 Decompose Stories into Tasks
- 6.10 Report a Bug
- 6.11 Manage Contacts
- 6.12 Customization
- 6.13 Import Excel, CSV Files
- 6.14 Document Management
- 6.15 Work Mode
- 6.16 Points
- 6.17 Required Field
- 6.18 Privileges
- 6.19 Annual Work Summary
-
7. Advanced Application
-
7.1. Workflow
- 7.1.1 ZenTao Workflow
-
7.2. Individual management
- 7.2.1 My Todo
- 7.2.2 My Task, Story and Bug
- 7.2.3 My Profile
-
7.3. Product Owner
- 7.3.1 Manage a Product
- 7.3.2 Manage a Product Line
- 7.3.3 Create and Review a Story
- 7.3.4 Change and Review a Story
- 7.3.5 Status and Phase
- 7.3.6 Story Writing
- 7.3.7 Product Module
- 7.3.8 Release Plan
- 7.3.9 Create a Release
- 7.3.10 Roadmap
- 7.3.11 Documents
- 7.3.12 Planning Meetings
- 7.3.13 Daily Scrum, Review and Retrospective Meetings
- 7.3.14 Story Reports
-
7.4. Scrum Master
- 7.4.1 Create a Sprint
- 7.4.2 Set a Team
- 7.4.3 Confirm a Story
- 7.4.4 Task Breakdown
- 7.4.5 Daily Standup Meetings
- 7.4.6 Check Project Progress via Burndown Chart
- 7.4.7 Check Project Progress via Lists
- 7.4.8 Review and Retrospective Meetings
- 7.4.9 Basic reports on tasks
-
7.5. Development Team
- 7.5.1 Project planning meeting and task breakdown
- 7.5.2 Claim tasks and update efforts
- 7.5.3 Kanban and Tree Diagram
- 7.5.4 Build
- 7.5.5 Test Request
- 7.5.6 Resolve a Bug
- 7.5.7 Documents
- 7.5.8 Confirm Bugs
-
7.6. Test Team
- 7.6.1 Bug Tracking
- 7.6.2 Report a Bug
- 7.6.3 Verify and Close a Bug
- 7.6.4 Activate a Bug
- 7.6.5 Find a Bug
- 7.6.6 Test Case
- 7.6.7 Create and Review Test Cases
- 7.6.8 Test Suites, Public Case Libs and Reports
- 7.6.9 Manage Test Requests
- 7.6.10 Run Cases and Report Bugs
- 7.6.11 Reports
-
7.1. Workflow
-
8. Configuration
-
8.1. Maintain ZenTao
- 8.1.1 Initialize scripts
- 8.1.2 Data Backup
- 8.1.3 Recover the Deleted
- 8.1.4 Update Burndown Charts
- 8.1.5 ZenTao Remote Host
-
8.2. Deploy ZenTao
- 8.2.1 Guest Login
- 8.2.2 Email Notification
- 8.2.3 Set Super Admin
- 8.2.4 Static Access
- 8.2.5 Remove "zentao" from URL
- 8.2.6 Integrate SVN
- 8.2.7 Integrate Git
- 8.2.8 Integrate Webhook
- 8.2.9 Integrate Xuan.im
- 8.2.10 Integrate Zdoo
- 8.2.11 Integrate Third-Party Apps
- 8.2.12 Password-Free Login
- 8.2.13 Translation Add-on
- 8.2.14 Integrate Jenkins
- 8.2.15 Extension
- 8.2.16 Fix Weak Password
-
8.1. Maintain ZenTao
-
9. Customization
- 9.1 Introduction
- 9.2 Directory
- 9.3 Find Codes
- 9.4 Database Structure
- 9.5 Common Modules
- 9.6 Add Features to Menu
- 9.7 Set Privileges to Modules
- 9.8 Examples: modify language prompt
- 9.9 Examples: set priority when creating bugs
- 9.10 Extension Editor
- 9.11 Feature Limitation
- 9.12 ZenTao Packaging Standards 1.1
-
10. Misc
- 10.1 About Third-Party Code
- 10.2 Support ZenTao
- 10.3 ZenTao Service
- 10.4 Acknowledgement
Create a Sprint
- 2015-09-11 13:27:29
- azalea
- 9387
- Last edited by philip on 2021-09-16 16:54:38
- Share links
Relations between products and projects in ZenTao are often asked. As clarified in Chapter 6.3 Zentao and Scrum, a project is what sprint is in ZenTao.
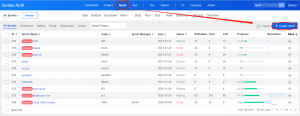
1. Create a Sprint
1.1 Go to Sprint and click Add Sprint. Note: You can always go to Admin->Custom->Concept to set either Project or Sprint you would like to see on the primary navigation bar.
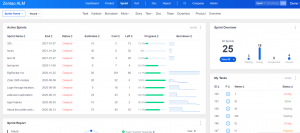
1.2 The page of adding a project will pop out.
On this page, you can set project name, alias, start and end date, assigned team, and descriptions. You don't have to link it to a product.
- Project alias is an abbreviation that is known and understood by the teams. For example, ZenTao once used “open sesame" as the project alias.
- The name of your teams can be customized, e.g. ZenTao Development Team.
- When adding projects, you can choose products to link, so you can link stories later.
- The project has its own access control, including Default, Private or Whitelist.
- Go to Admin->Custom->Flow to choose among three ways to display, including Product-Project, Product-Sprint, and Project-Sprint. It is the display name that is different, and the workflows stay the same.


Comment
Write a Comment
Products
- ZDOO
- ZDOO Cloud
Support
- Book a Demo
- Tech Forum
- GitHub
- SourceForge
About Us
- Company
- Privacy Policy
- Term of Use
- Blogs
- Partners
Contact Us
- Leave a Message
- Email Us: support@zentaoalm.com


I have a difficulty how to set status in project to closed. In database I can see closedDate parameter for projects. How I can set status "closed" to a project? I was able to set status "done" but it did not fill a parameter closedDate or closedBy.
Thanks for help!